

เรื่องที่สำคัญของการพัฒนา software คือ
ขั้นตอนการ build, test, release และ deploy เป็นอย่างไรบ้าง
ในการพัฒนาที่ดี น่าจะต้องวางแผนและกำหนดขั้นตอนการทำงานไว้
ซึ่งเราจะเรียกขั้นตอนเหล่านี้ว่า Build pipeline (workflow)
นำมาจากแนวคิดของ Continuous Integration และ Continuous Delivery
โดยในบทความนี้ จะนำ GitHub Actions มาสร้างกระบวนการเหล่านี้
มาเริ่มกันเลย
ก่อนจะใช้เครื่องมือ ต้องคิดและออกแบบว่าเราต้องการอะไรบ้าง ?
ลองสร้างระบบง่าย ๆ เมื่อมีการ push หรือเปิด Pull Request มายัง repository
โดยมีขั้นตอนการทำงานดังนี้
- Manage dependency ทำการ download dependency ต่าง ๆ ที่ใช้งาน
- Lint
- Test
- Code coverage ด้วย CodeCov
- Build สำหรับสร้าง binary file
- กระบวนการ release เช่นสร้าง binary file ของระบบปฏิบัติการต่าง ๆ ด้วย Go Releaser
มาลงมือสร้างขั้นตอนการทำงานด้วย GitHub Actions
ตัวอย่างของ source code อยู่ที่ GitHub:Up1
จากนั้นทำการสร้าง GitHub Actions ใน repository เลย
หรือจะสร้างเองด้วยการสร้าง file .github/workflow/build.yml
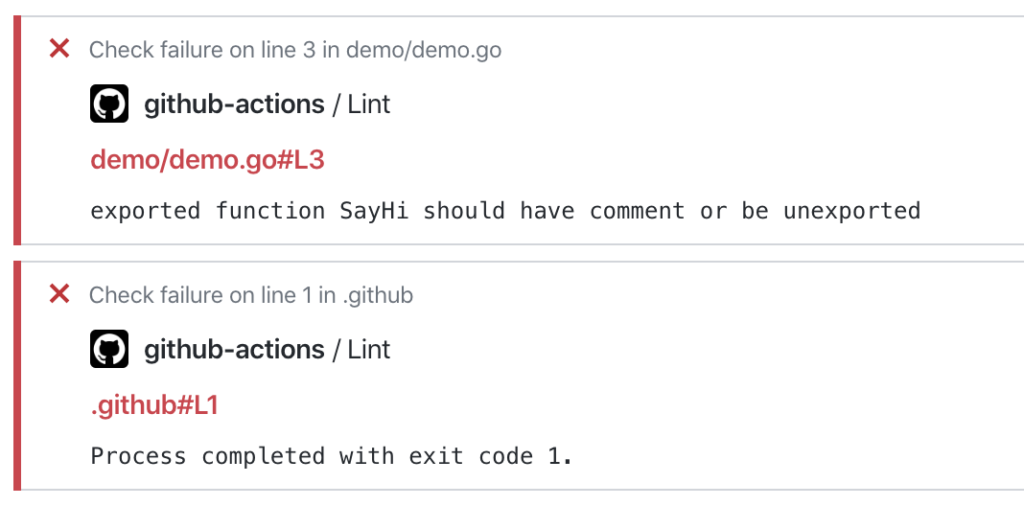
เริ่มต้นด้วยขั้นตอนแรกคือ Lint ด้วย Golint
จะทำงานเมื่อมีการ push และ ส่ง Pull Request มายัง branch master
[gist id="7cf925a678991744f4a1430200492e1c" file="1.yml"]จากนั้นเข้าไปดูใน menu Actions จะทำงานและได้ผลดังนี้
เนื่องจากใน code ไม่ทำการเขียน comment ของ public function
แสดงดังนี้
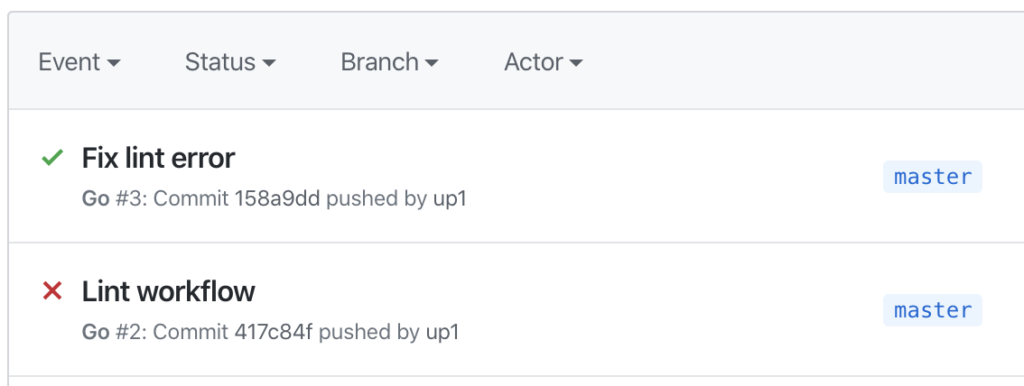
แน่นอนว่า ต้องแก้ไข code และทำการ push ขึ้นไปใน repository
จะได้ผลการทำงานดังนี้
ขั้นตอนที่ 2 ทำการทดสอบและ code coverage report
[gist id="7cf925a678991744f4a1430200492e1c" file="2.yml"]ไปดู code coverage report ได้ดังนี้

หรือลองเปิด Pull Request เข้ามายัง repository ดูหน่อย
จะมีผลการทำงานดังนี้

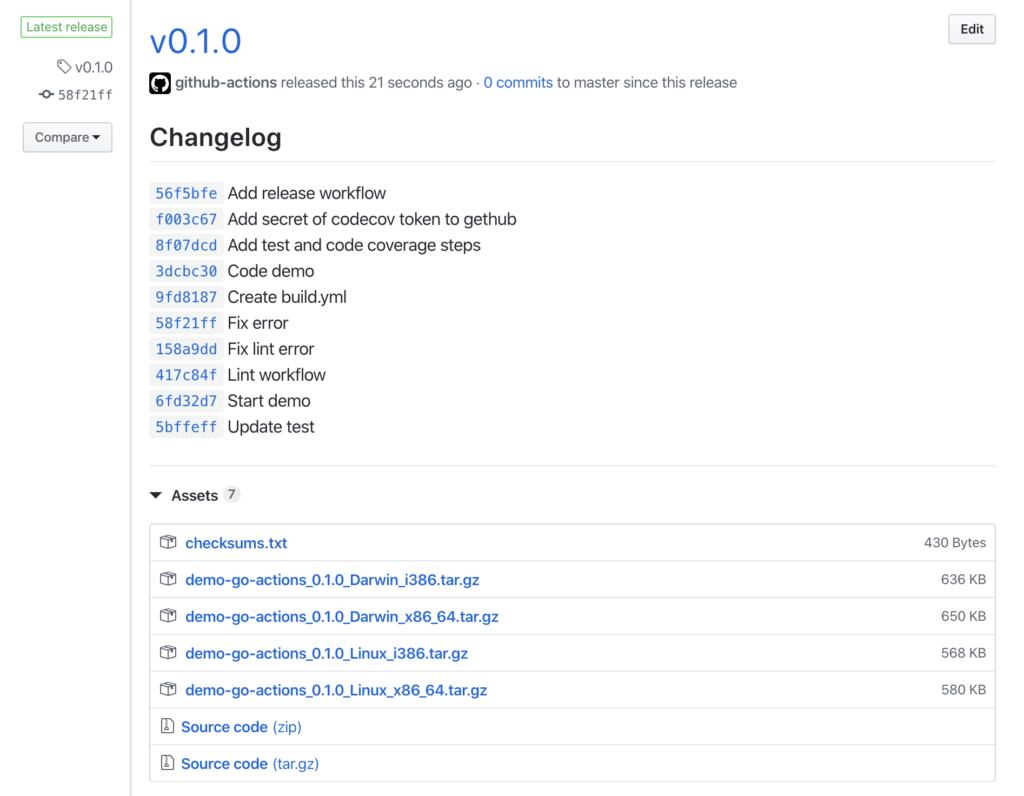
ขั้นตอนที่ 3 ทำการ release ด้วยการสร้าง file สำหรับ deploy บน OS ต่าง ๆ
ด้วยการใช้ Go Releaser ซึ่งง่ายมาก ๆ
จะทำการเมื่อมีการสร้าง tag ขึ้นมาใน repository
โดยที่ชื่อ tag ต้องเป็น Semantic versioning ด้วย
ดังนี้
เมื่อทำการ push tag ขึ้นไปใน repository จะทำงานดังนี้
ลองนำไปใช้กันดูครับ สะดวกดีนะ
สามารถนำไปต่อยอดเรื่องของ deploy ต่อไป
รวมทั้งเรื่องของ functional testing อีก
ขอให้สนุกกับการ coding ครับ